You can make your movies differently by editing them on Windows Movie Maker, but not all file types will work when you try to use them. Some movies, like MP4 files which are downloaded from free sites, recorded from cameras, or iPhone, iPad, Blackberry, Android phone, are not recognizable on Movie Maker.
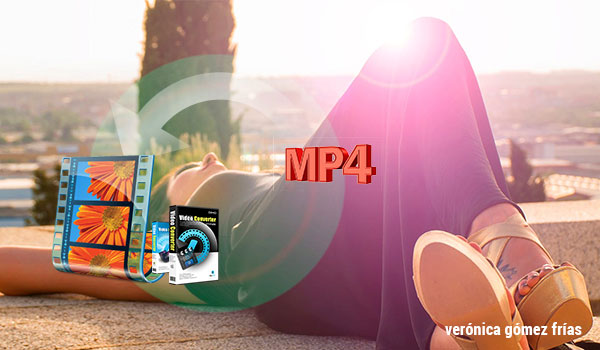 In fact, Windows Movie Maker supports a small amount of video formats including ASF, AVI, WMV, MPEG-1, MPEG, MPG, M1V, MP2, MPV2, WM, MPE, etc. and MP4 is not included, that's why "every time when you import MP4 to Windows Movie Maker or Windows Live Movie Maker, it stops working". If you are mired in the mess, read on to find out the solution to edit MP4 files in Windows Movie Maker in a smooth way.
Don't let that format issue stop you from showing your creativity. To make MP4 files compatible with Windows Movie Maker, you'll just convert MP4 to Windows Movie Maker supported formats like WMV or AVI. Now I share the guide with you how to convert MP4 to Windows Movie Maker friendly format using Dimo Video Converter Ultimate.
With it, you can effortlessly transcode MP4 files for smoothly importing and editing in various non-linear editing systems (NLE), including Movie Maker, Pinnacle Studio, Adobe Premiere Pro, Cyberlink PowerDirector, Avid Studio, Magix Movie Edit Pro, Sony Vegas Pro and more retaining high quality. Besides MP4, you can almost convert all video files like MKV, AVI, VOB, TiVo, MTS, MOV, MXF, etc. for editing in Windows Movie Maker smoothly. Now download it and follow the steps below to complete your task.
In fact, Windows Movie Maker supports a small amount of video formats including ASF, AVI, WMV, MPEG-1, MPEG, MPG, M1V, MP2, MPV2, WM, MPE, etc. and MP4 is not included, that's why "every time when you import MP4 to Windows Movie Maker or Windows Live Movie Maker, it stops working". If you are mired in the mess, read on to find out the solution to edit MP4 files in Windows Movie Maker in a smooth way.
Don't let that format issue stop you from showing your creativity. To make MP4 files compatible with Windows Movie Maker, you'll just convert MP4 to Windows Movie Maker supported formats like WMV or AVI. Now I share the guide with you how to convert MP4 to Windows Movie Maker friendly format using Dimo Video Converter Ultimate.
With it, you can effortlessly transcode MP4 files for smoothly importing and editing in various non-linear editing systems (NLE), including Movie Maker, Pinnacle Studio, Adobe Premiere Pro, Cyberlink PowerDirector, Avid Studio, Magix Movie Edit Pro, Sony Vegas Pro and more retaining high quality. Besides MP4, you can almost convert all video files like MKV, AVI, VOB, TiVo, MTS, MOV, MXF, etc. for editing in Windows Movie Maker smoothly. Now download it and follow the steps below to complete your task.
Free Download Dimo Video Converter Ultimate (Win/Mac):

 Convert and Import MP4 videos into Windows Movie Maker
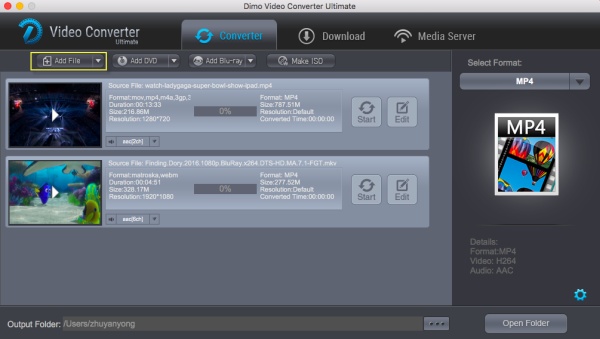
Step 1: Add MP4 files
Install and launch the MP4 video converter for Movie Maker, and then click "Add File" button to import your MP4 files to the software.
Convert and Import MP4 videos into Windows Movie Maker
Step 1: Add MP4 files
Install and launch the MP4 video converter for Movie Maker, and then click "Add File" button to import your MP4 files to the software.
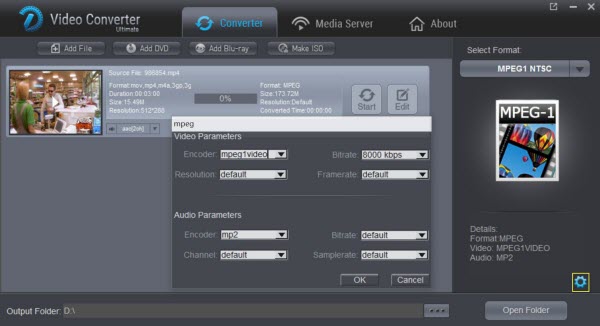
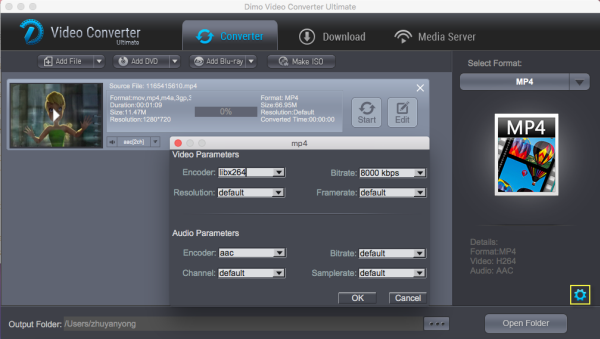
 Step 2: Choose output format
Click "Select Format" bar and choose "Editor > Movie Maker" as output format on the drop-down menu of "Select Format". Of course, you can also choose AVI, WMV from "Format > Video" as the output format.
Tip: Click the Settings icon to adjust video and audio parameters on the Profile Setting as you need to get the best quality video.
Step 2: Choose output format
Click "Select Format" bar and choose "Editor > Movie Maker" as output format on the drop-down menu of "Select Format". Of course, you can also choose AVI, WMV from "Format > Video" as the output format.
Tip: Click the Settings icon to adjust video and audio parameters on the Profile Setting as you need to get the best quality video.
 Step 3: Convert MP4 to Windows Movie Maker
Simply click the "Start" button to start converting to make MP4 video clips compatible with WMM and everything else will be automated. You're done. Now your MP4 files will be converted into WMV or AVI video files ready to be imported to Windows Movie Maker as well as Windows Live Movie Maker.
Step 4: Import MP4 to Windows Movie Maker
Depending on your version of Windows Movie Maker or Windows Live Movie Maker, the buttons are slightly different:
Import MP4 video to Windows Movie Maker: When the conversion complete, open Windows Movie Maker and click Import or Import Video on the left to import your video to the movie collection and drag and drop to the timeline for editing.
Import MP4 video to Windows Live Movie Maker: Start Windows Live Movie Maker and go to Home tab in the ribbon menu and click Add video in the Add panel to locate the converted MP4 video.
Now start working with MP4 files in Windows Movie Maker beautifully. After that, you can save the output WLMP files to AVI/MP4 or even share them onto mobile devices wirelessly.
Related Software:
BDmate (Mac/Win)
Lossless backup Blu-ray to MKV with all audio and subtitle tracks; Rip Blu-ray to multi-track MP4; Convert Blu-ray to almost all popular video/audio formats and devices; Copy Blu-ray to ISO/M2TS; Share digitized Blu-ray wirelessly.
DVDmate (Mac/Win)
A professional DVD ripping and editing tool with strong ability to remove DVD protection, transcode DVD to any video and audio format, and edit DVD to create personal movie.
Videomate (Mac/Win)
An all-around video converter software program that enables you to convert various video and audio files to formats that are supported by most multimedia devices.
8K Player (Mac/Win)
A mixture of free HD/4K video player, music player, Blu-ray/DVD player, video recorder and gif maker.
Free Download or Purchase Dimo Video Converter Ultimate:
Step 3: Convert MP4 to Windows Movie Maker
Simply click the "Start" button to start converting to make MP4 video clips compatible with WMM and everything else will be automated. You're done. Now your MP4 files will be converted into WMV or AVI video files ready to be imported to Windows Movie Maker as well as Windows Live Movie Maker.
Step 4: Import MP4 to Windows Movie Maker
Depending on your version of Windows Movie Maker or Windows Live Movie Maker, the buttons are slightly different:
Import MP4 video to Windows Movie Maker: When the conversion complete, open Windows Movie Maker and click Import or Import Video on the left to import your video to the movie collection and drag and drop to the timeline for editing.
Import MP4 video to Windows Live Movie Maker: Start Windows Live Movie Maker and go to Home tab in the ribbon menu and click Add video in the Add panel to locate the converted MP4 video.
Now start working with MP4 files in Windows Movie Maker beautifully. After that, you can save the output WLMP files to AVI/MP4 or even share them onto mobile devices wirelessly.
Related Software:
BDmate (Mac/Win)
Lossless backup Blu-ray to MKV with all audio and subtitle tracks; Rip Blu-ray to multi-track MP4; Convert Blu-ray to almost all popular video/audio formats and devices; Copy Blu-ray to ISO/M2TS; Share digitized Blu-ray wirelessly.
DVDmate (Mac/Win)
A professional DVD ripping and editing tool with strong ability to remove DVD protection, transcode DVD to any video and audio format, and edit DVD to create personal movie.
Videomate (Mac/Win)
An all-around video converter software program that enables you to convert various video and audio files to formats that are supported by most multimedia devices.
8K Player (Mac/Win)
A mixture of free HD/4K video player, music player, Blu-ray/DVD player, video recorder and gif maker.
Free Download or Purchase Dimo Video Converter Ultimate:


 Kindly Note:
The price of Dimo Video Converter Ultimate for Windows is divided into 1 Year Subscription, Lifetime/Family/Business License: $43.95/Year; $45.95/lifetime license; $95.95/family license(2-4 PCs); $189.95/business pack(5-8 PCs). Get your needed one at purchase page.
Kindly Note:
The price of Dimo Video Converter Ultimate for Windows is divided into 1 Year Subscription, Lifetime/Family/Business License: $43.95/Year; $45.95/lifetime license; $95.95/family license(2-4 PCs); $189.95/business pack(5-8 PCs). Get your needed one at purchase page.
Contact us or leave a message at Facebook if you have any issues.
Related Articles:
Source: Convert MP4 movie for using in Windows Movie Maker
You would handle kinds of video files daily, including YouTube MP4 videos, Sony MP4 Camcorder videos(XDCam-EX), GoPro MP4 footage, game MP4 recordings with OBS(Open Broadcaster Software), etc. And in order to get more wonderful videos, you probably will choose to edit .mp4 files with Camtasia which is a good option your screen and edit your videos to get professional-like videos before sharing to YouTube or FaceBook. While, there are dozen of .mp4 files can't be imported into Camtasia software, for the complex video codec of MP4 files. This article will be along with you to root the trouble and solution out here.
 Some people including you may be confused: Camtasia says it supports MP4 at Techsmith support site, but why I can't import MP4 to Camtasia Studio? Well, that's because Camtasia prefers AVC/h.264 at no more than 30 frames per second instead of others while MP4 can contain various video codecs. So if you MP4 files are not accepted by Camtasia Studio, it's probably because of the video codec incompatibility.
To fix the problem, you'll need to convert those MP4 to a more editing-friendly format for Camtasia Studio with a MP4 file converter app. Dimo Video Converter Ultimate which is an easy-to-use MP4 converter for you, which can help you change MP4 into a Camtasia Studio accepted MPEG-1/MOV/MP4 with least quality loss. You should then be able to import the new file into Camtasia Studio with smooth editing without any trouble.
The all-in-one and easy-to-use toolkit can convert all other popular video formats like AVI, MOV, MXF, WMV, MKV, FLV, ASF, M2TS, VOB, etc. to Camtasia Studio natively supported video formats on Windows (Windows 10 included) with fast encoding speed. For Mac users, just get Dimo Video Converter Ultimate for Mac to get th job done. See how below about converting MP4 files to Camtasia Studio format.
Some people including you may be confused: Camtasia says it supports MP4 at Techsmith support site, but why I can't import MP4 to Camtasia Studio? Well, that's because Camtasia prefers AVC/h.264 at no more than 30 frames per second instead of others while MP4 can contain various video codecs. So if you MP4 files are not accepted by Camtasia Studio, it's probably because of the video codec incompatibility.
To fix the problem, you'll need to convert those MP4 to a more editing-friendly format for Camtasia Studio with a MP4 file converter app. Dimo Video Converter Ultimate which is an easy-to-use MP4 converter for you, which can help you change MP4 into a Camtasia Studio accepted MPEG-1/MOV/MP4 with least quality loss. You should then be able to import the new file into Camtasia Studio with smooth editing without any trouble.
The all-in-one and easy-to-use toolkit can convert all other popular video formats like AVI, MOV, MXF, WMV, MKV, FLV, ASF, M2TS, VOB, etc. to Camtasia Studio natively supported video formats on Windows (Windows 10 included) with fast encoding speed. For Mac users, just get Dimo Video Converter Ultimate for Mac to get th job done. See how below about converting MP4 files to Camtasia Studio format.
Free Download Dimo Video Converter Ultimate (Win/Mac):
How to Convert MP4 files for Editing in Camtasia Studio 9/8/7
Step 1. Load .MP4 files
Drag & drop MP4 files to the program directly. Or go to the "Add file" to locate the MP4 files you want to add. You can add several files to do conversion at the same time.
 Step 2. Select the output format
Click "Select Format" bar and then move your pointer to "Format" and turn to "HD Video" or "Video" and choose MPEG-1 or MOV as target format. Besides, you can also choose AVI, WMV, MP4, etc. if you want to get a relatively smaller output file.
Step 3 (optional): Adjust the video, audio settings
Click "Settings" to fix the frame rate, bitrate, video size, etc to your needs. If you want to edit in Camtasia Studio without having to render the clips while editing, all the frame sizes must be the same as the sequence settings. You can save a lot of render time by making all the clips the same size with this MOV video converter.
Step 2. Select the output format
Click "Select Format" bar and then move your pointer to "Format" and turn to "HD Video" or "Video" and choose MPEG-1 or MOV as target format. Besides, you can also choose AVI, WMV, MP4, etc. if you want to get a relatively smaller output file.
Step 3 (optional): Adjust the video, audio settings
Click "Settings" to fix the frame rate, bitrate, video size, etc to your needs. If you want to edit in Camtasia Studio without having to render the clips while editing, all the frame sizes must be the same as the sequence settings. You can save a lot of render time by making all the clips the same size with this MOV video converter.
 Tip: Furthermore, you are provided some useful edit functions cropping, trimming, adding watermark, adjusting effects for pre-editing your video files so that you can simplify your Camtasia Studio editing.
Step 3. Start MP4 to Camtasia Studio conversion
Click the "Start" button to start the MP4 to Camtasia conversion. Just in a few minutes, you make it.
Step 4. Import MP4 into Camtasia Studio
After the conversion, click "Open" to locate the result videos and then launch Camtasia Studio and click "Import media" import the converted MP4 video into Camtasia Studio; prepare for editing. You will find that it's just a piece of cake to edit MP4 files in Camtasia Studio.
After editing or recording, you can export video toCamtasia Studio for playing and sharing.
Free Download or Purchase Dimo Video Converter Ultimate:
Kindly Note:
The price of Dimo Video Converter Ultimate for Windows is divided into 1 Year Subscription, Lifetime/Family/Business License: $43.95/Year; $45.95/lifetime license; $95.95/family license(2-4 PCs); $189.95/business pack(5-8 PCs). Get your needed one at purchase page.
Contact us or leave a message at Facebook if you have any issues.
Related Articles:
Source: Camtasia MP4 Tutorial- Import MP4 to Camtasia Studio
Tip: Furthermore, you are provided some useful edit functions cropping, trimming, adding watermark, adjusting effects for pre-editing your video files so that you can simplify your Camtasia Studio editing.
Step 3. Start MP4 to Camtasia Studio conversion
Click the "Start" button to start the MP4 to Camtasia conversion. Just in a few minutes, you make it.
Step 4. Import MP4 into Camtasia Studio
After the conversion, click "Open" to locate the result videos and then launch Camtasia Studio and click "Import media" import the converted MP4 video into Camtasia Studio; prepare for editing. You will find that it's just a piece of cake to edit MP4 files in Camtasia Studio.
After editing or recording, you can export video toCamtasia Studio for playing and sharing.
Free Download or Purchase Dimo Video Converter Ultimate:
Kindly Note:
The price of Dimo Video Converter Ultimate for Windows is divided into 1 Year Subscription, Lifetime/Family/Business License: $43.95/Year; $45.95/lifetime license; $95.95/family license(2-4 PCs); $189.95/business pack(5-8 PCs). Get your needed one at purchase page.
Contact us or leave a message at Facebook if you have any issues.
Related Articles:
Source: Camtasia MP4 Tutorial- Import MP4 to Camtasia Studio
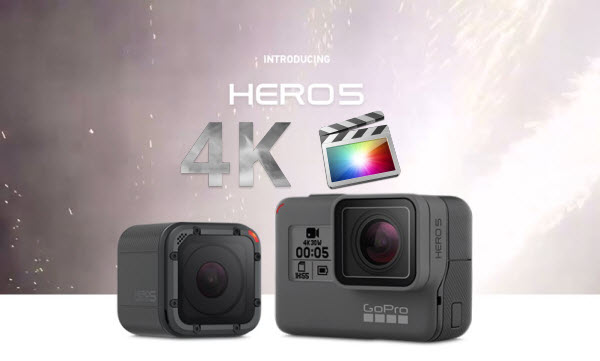
GoPro has finally released their newest action camera the GoPro Hero 5! With 2 new model Hero5 Black and Hero5 Session. For video capture, the Hero 5 retains the same specs as the Hero 4, although it's not repurposing the same chipset. It can shoot up to 4K at 30 frames per second and Full HD 1080p at 120 fps (max bit rate is 60Mbps). Though 4K MP4 generated from Hero 5 is well compatible with some of Mac software like QuickTime player, iTunes, etc. However, when it comes to importing the GoPro Hero 5 4K MP4 videos to FCP 7 for editing, it is a painful experience to Hero 5 owners.
 In fact, H.264 MP4 is an ideal file type for video capture in an SLR camera, delivering relatively compact file sizes with image quality noticeably superior to alternate video compressions (such as Motion JPEG). However, the H.264 compression format requires that files be transcoded into a format better suited to editing, effects, and color grading.
Worse still, learn from Apple official site, though FCP X has been updated to provide unprecedented performance when editing and monitoring 4K video. Final Cut Pro X natively supports 4K ProRes, Sony XAVC and REDCODE RAW, the old version FCP X or Final Cut Pro 6/7 like many editors use 1080p as primary delivery format and will continue to do so for a long time. If you want to have a smooth 4K MP4 from GoPro Hero 5 and FCP workflow, you are advised to convert Hero 5 4K video to Apple Prores Codec MOV, which is natively compatible with Final Cut Pro.
In this case, Dimo Videomate for Mac is best choice to get the work done. Overall, this program is a completely professional Mac 4K video converter, player and editor. Unlike some free video converters, it provides hundreds of output format presets for 4K videos, such as Apple ProRes 422, Apple ProRes 4444 for Final Cut Pro, DNxHD for Avid Media Composer, MPEG-2 for Premiere better editing.
This Ultra HD Video Converter is also available to customize the output resolutions to any size the users want so as to downscale Gopro Hero 5 4K MP4 to 1080p for smooth editing. With the built-in video editor, you can choose to trim, crop, add watermark to edit your original 4K MP4 videos from Hero 5. Thus, with the video converter app, you can fast transcode GoPro Hero 5 4K video to FCP X/7/6 friendly format with ease. If you are working on Windows (Windows 10 included), please turn to Videomate which can transcode 4K to Apple Prores for FCP on Windows.
Free Download Videomate for Mac/Win:
Converting Gopro Hero 5 4K footage to FCP editable video
Note: If you are FCP X users, before you try to do the conversion, don't forget to make sure that you have installed the Apple ProRes Codec manually since the FCP X asks users to install it by themselves.
1. Launch the 4K Video Converter for Mac and click add button to import Hero 5 4K clips to the program for converting.
In fact, H.264 MP4 is an ideal file type for video capture in an SLR camera, delivering relatively compact file sizes with image quality noticeably superior to alternate video compressions (such as Motion JPEG). However, the H.264 compression format requires that files be transcoded into a format better suited to editing, effects, and color grading.
Worse still, learn from Apple official site, though FCP X has been updated to provide unprecedented performance when editing and monitoring 4K video. Final Cut Pro X natively supports 4K ProRes, Sony XAVC and REDCODE RAW, the old version FCP X or Final Cut Pro 6/7 like many editors use 1080p as primary delivery format and will continue to do so for a long time. If you want to have a smooth 4K MP4 from GoPro Hero 5 and FCP workflow, you are advised to convert Hero 5 4K video to Apple Prores Codec MOV, which is natively compatible with Final Cut Pro.
In this case, Dimo Videomate for Mac is best choice to get the work done. Overall, this program is a completely professional Mac 4K video converter, player and editor. Unlike some free video converters, it provides hundreds of output format presets for 4K videos, such as Apple ProRes 422, Apple ProRes 4444 for Final Cut Pro, DNxHD for Avid Media Composer, MPEG-2 for Premiere better editing.
This Ultra HD Video Converter is also available to customize the output resolutions to any size the users want so as to downscale Gopro Hero 5 4K MP4 to 1080p for smooth editing. With the built-in video editor, you can choose to trim, crop, add watermark to edit your original 4K MP4 videos from Hero 5. Thus, with the video converter app, you can fast transcode GoPro Hero 5 4K video to FCP X/7/6 friendly format with ease. If you are working on Windows (Windows 10 included), please turn to Videomate which can transcode 4K to Apple Prores for FCP on Windows.
Free Download Videomate for Mac/Win:
Converting Gopro Hero 5 4K footage to FCP editable video
Note: If you are FCP X users, before you try to do the conversion, don't forget to make sure that you have installed the Apple ProRes Codec manually since the FCP X asks users to install it by themselves.
1. Launch the 4K Video Converter for Mac and click add button to import Hero 5 4K clips to the program for converting.
 2. Click "Select Format" bar to choose the output format. You can freely choose "Format > Editor > Final Cut Pro X or Final Cut Pro 7" for editing natively.
Tip: You can click the "Settings" button and video size, bitrate and fame rate are flexible and can be adjusted as you like. Since Final Cut Pro 6/7 and even the Final Cut Pro X can’t handle 4K well, 1080p would be the best settings. Of course, if you wanna get a 4K workflow in FCP, you keep the original video resolution.
3. Hit "Start" button to start transcoding Gopro Hero 5 4K MP4 to Final Cut Pro editable ProRes 422 codec.
Once the process completes, you can find the generated videos via "Open" button. Now, it is easy for you to transfer the encoded Gopro Hero 5 4K videos to FCP X/7/6 for further editing and even share edited video from FCP to iPhone/iPad/Android for watching with Dimo Free Media Server.
Additional Tip:
Get Dimo Video Converter Ultimate for Mac/Dimo Video Converter Ultimate with Only $45.95, which can save you $63.9(BDmate $39.95 + Videomate $39.95 + DVDmate $29.95 = $109.85), then you can enjoy any Blu-ray/DVD/ISO or common movies freely on Mac(OS Sierra).
Related Software:
BDmate (Mac/Win)
Lossless backup Blu-ray to MKV with all audio and subtitle tracks; Rip Blu-ray to multi-track MP4; Convert Blu-ray to almost all popular video/audio formats and devices; Copy Blu-ray to ISO/M2TS; Share digitized Blu-ray wirelessly.
DVDmate (Mac/Win)
A professional DVD ripping and editing tool with strong ability to remove DVD protection, transcode DVD to any video and audio format, and edit DVD to create personal movie.
8K Player (Mac/Win)
A mixture of free HD/4K video player, music player, Blu-ray/DVD player, video recorder and gif maker.
Free Download or Purchase Videomate for Mac/Win:
2. Click "Select Format" bar to choose the output format. You can freely choose "Format > Editor > Final Cut Pro X or Final Cut Pro 7" for editing natively.
Tip: You can click the "Settings" button and video size, bitrate and fame rate are flexible and can be adjusted as you like. Since Final Cut Pro 6/7 and even the Final Cut Pro X can’t handle 4K well, 1080p would be the best settings. Of course, if you wanna get a 4K workflow in FCP, you keep the original video resolution.
3. Hit "Start" button to start transcoding Gopro Hero 5 4K MP4 to Final Cut Pro editable ProRes 422 codec.
Once the process completes, you can find the generated videos via "Open" button. Now, it is easy for you to transfer the encoded Gopro Hero 5 4K videos to FCP X/7/6 for further editing and even share edited video from FCP to iPhone/iPad/Android for watching with Dimo Free Media Server.
Additional Tip:
Get Dimo Video Converter Ultimate for Mac/Dimo Video Converter Ultimate with Only $45.95, which can save you $63.9(BDmate $39.95 + Videomate $39.95 + DVDmate $29.95 = $109.85), then you can enjoy any Blu-ray/DVD/ISO or common movies freely on Mac(OS Sierra).
Related Software:
BDmate (Mac/Win)
Lossless backup Blu-ray to MKV with all audio and subtitle tracks; Rip Blu-ray to multi-track MP4; Convert Blu-ray to almost all popular video/audio formats and devices; Copy Blu-ray to ISO/M2TS; Share digitized Blu-ray wirelessly.
DVDmate (Mac/Win)
A professional DVD ripping and editing tool with strong ability to remove DVD protection, transcode DVD to any video and audio format, and edit DVD to create personal movie.
8K Player (Mac/Win)
A mixture of free HD/4K video player, music player, Blu-ray/DVD player, video recorder and gif maker.
Free Download or Purchase Videomate for Mac/Win:

 Contact us or leave a message at Facebook if you have any issues.
Related Articles:
Source: Downscale Gopro Hero 5 4K MP4 to 1080p ProRes for FCP
Contact us or leave a message at Facebook if you have any issues.
Related Articles:
Source: Downscale Gopro Hero 5 4K MP4 to 1080p ProRes for FCP
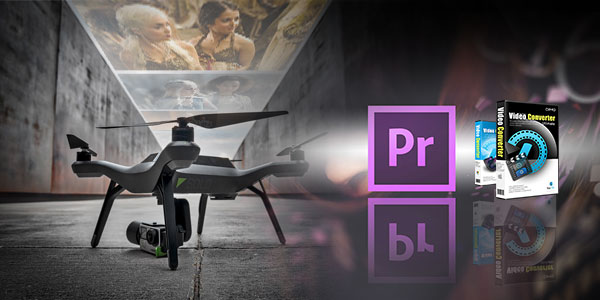 The 3DR Solo drone was specifically designed for the GoPro Hero 4 camera. The 3DR has many features such as cable cam, orbit, follow me and selfie which will allow you to capture great aerial photos and film from all angles. The 3DR Solo is top notch and terrific for shooting great aerial scenery in 4k UHD with GoPro Hero 4 which can film 4K video at 30 frames per second and 2.7K at 60 frames per second.
After recording some stunning 4K footage by 3DR Solo, chances are you want to edit these 4K videos in Premiere Pro so as to make them more stylish, before uploading to YouTube or posting on Facebook. Although Adobe claimed that Premiere Pro CC can handle (usually) 4K files without much problem, many people have found it a painful experience to edit 3DR Solo 4K footage in Premiere Pro CC. And you will encounter laggy playback problems now and them. What's more, Adobe PP CC can handle (usually) 4K files without much problem, but it is extremely hardware intensive. And below is Premiere Pro CC optimized 4K playback settings.
The list of 4k editing optimizations for Premiere Pro CC:
Hardware
CPU: minimum Intel i7-5930K or equivalent. AMD lagging way behind.
RAM: minimum 16GB, better 32GB or more
GPU: dedicated graphics with minimum NVidia GTX 780Ti, or GTX 970 or the higher end Quadro M4000. AMD have currently unreliable drivers.
GPU: VRAM minimum 3GB with 256bit memory bus
HDD: at least 100MB/s read/write speed
Premiere Pro CC Settings
Disable High-Quality Playback, gets you apx. 5-10% performance (Player Window/Wrench Icon/High Qaulity Playback).
INFO: Mercury Engine Transmit to second monitor, takes away apx. 5-10% performance (Player Window/Wrench Icon/Enable Transmit).
RedCode/Cineform movie files: Set playback resolution to 1/2 or 1/4 size will increase performace apx. 10-20% (Player Window/Full-1/2-1/4,etc.)
Increase Playback Preroll and Postroll time to 3-8 seconds for smoother playback, especially with slower harddrives (Edit/Preferences/Playback/Preroll-Postroll).
Disable Lumetri Scopes if not needed. They have been optimized in PP 2015.3 but you loose 3-8% performance when enabled (Window/Lumetri Scopes).
What if you're getting lag in playback while working with 3DR Solo 4K footage in Premiere CC/CS6/CS5/CS4? Thankfully you probably don't have to buy a new computer… In the professional world, 4K is a digital cinema standard that calls for a 4096 x 2160 pixel resolution. However, the majority of work is still being finished in 1080p. So before importing the 4K footage to Premiere for smooth editing without crashing your computer, you'd better downscale 3DR Solo 4K footage to 1080p and transcode the 4K stuff formatted/encoded in MOV or MP4 to Premiere more-editing friendly format, such as MPEG-2.
Actually, it's not as difficult as you imagine. What's need is a just a video converter for Mac like Dimo Video Converter Ultimate for Mac - The program works as the best Mac 4K Video Converter. It helps you fast transcode 3DR Solo, DJI Phantom 4, DJI Phantom 3, DJI Phantom 2 footage to Premiere Pro preferred MPEG-2 with fast encoding speed and without quality loss.
What's more, it's the optimal tool for transcoding GoPro, Sony, Canon, Nikon, Panasonic, etc camera or camcorder videos to kinds of NLE programs Avid Media Composer, Adobe Premier Pro, Final Cut Pro, FCE and more. For Windows user, please turn to Dimo Video Converter Ultimate. Just download it and follow the simple guide to achieve your goal.
The 3DR Solo drone was specifically designed for the GoPro Hero 4 camera. The 3DR has many features such as cable cam, orbit, follow me and selfie which will allow you to capture great aerial photos and film from all angles. The 3DR Solo is top notch and terrific for shooting great aerial scenery in 4k UHD with GoPro Hero 4 which can film 4K video at 30 frames per second and 2.7K at 60 frames per second.
After recording some stunning 4K footage by 3DR Solo, chances are you want to edit these 4K videos in Premiere Pro so as to make them more stylish, before uploading to YouTube or posting on Facebook. Although Adobe claimed that Premiere Pro CC can handle (usually) 4K files without much problem, many people have found it a painful experience to edit 3DR Solo 4K footage in Premiere Pro CC. And you will encounter laggy playback problems now and them. What's more, Adobe PP CC can handle (usually) 4K files without much problem, but it is extremely hardware intensive. And below is Premiere Pro CC optimized 4K playback settings.
The list of 4k editing optimizations for Premiere Pro CC:
Hardware
CPU: minimum Intel i7-5930K or equivalent. AMD lagging way behind.
RAM: minimum 16GB, better 32GB or more
GPU: dedicated graphics with minimum NVidia GTX 780Ti, or GTX 970 or the higher end Quadro M4000. AMD have currently unreliable drivers.
GPU: VRAM minimum 3GB with 256bit memory bus
HDD: at least 100MB/s read/write speed
Premiere Pro CC Settings
Disable High-Quality Playback, gets you apx. 5-10% performance (Player Window/Wrench Icon/High Qaulity Playback).
INFO: Mercury Engine Transmit to second monitor, takes away apx. 5-10% performance (Player Window/Wrench Icon/Enable Transmit).
RedCode/Cineform movie files: Set playback resolution to 1/2 or 1/4 size will increase performace apx. 10-20% (Player Window/Full-1/2-1/4,etc.)
Increase Playback Preroll and Postroll time to 3-8 seconds for smoother playback, especially with slower harddrives (Edit/Preferences/Playback/Preroll-Postroll).
Disable Lumetri Scopes if not needed. They have been optimized in PP 2015.3 but you loose 3-8% performance when enabled (Window/Lumetri Scopes).
What if you're getting lag in playback while working with 3DR Solo 4K footage in Premiere CC/CS6/CS5/CS4? Thankfully you probably don't have to buy a new computer… In the professional world, 4K is a digital cinema standard that calls for a 4096 x 2160 pixel resolution. However, the majority of work is still being finished in 1080p. So before importing the 4K footage to Premiere for smooth editing without crashing your computer, you'd better downscale 3DR Solo 4K footage to 1080p and transcode the 4K stuff formatted/encoded in MOV or MP4 to Premiere more-editing friendly format, such as MPEG-2.
Actually, it's not as difficult as you imagine. What's need is a just a video converter for Mac like Dimo Video Converter Ultimate for Mac - The program works as the best Mac 4K Video Converter. It helps you fast transcode 3DR Solo, DJI Phantom 4, DJI Phantom 3, DJI Phantom 2 footage to Premiere Pro preferred MPEG-2 with fast encoding speed and without quality loss.
What's more, it's the optimal tool for transcoding GoPro, Sony, Canon, Nikon, Panasonic, etc camera or camcorder videos to kinds of NLE programs Avid Media Composer, Adobe Premier Pro, Final Cut Pro, FCE and more. For Windows user, please turn to Dimo Video Converter Ultimate. Just download it and follow the simple guide to achieve your goal.
Free Download Dimo Video Converter Ultimate for Mac/Win:
Converting 3DR Solo 4K video to work in Premiere Pro Pro
Step 1: Run the program you just set up. Drag and drop the 4K files to the Converter. You can also hit "Add File" button to import videos to the app.
 Step 2. Choose output format > Click "Select Format" bar and choose "Editor > Adobe Premiere" as output format for editing raw 4K in Adobe with natively supported video codec.
3. Advanced V/A settings > Click "Settings" button if you'd like to customize advanced audio and video parameters like Video Codec, aspect ratio, bit rate, frame rate, Audio codec, sample rate, audio channels.
Step 2. Choose output format > Click "Select Format" bar and choose "Editor > Adobe Premiere" as output format for editing raw 4K in Adobe with natively supported video codec.
3. Advanced V/A settings > Click "Settings" button if you'd like to customize advanced audio and video parameters like Video Codec, aspect ratio, bit rate, frame rate, Audio codec, sample rate, audio channels.
 Note: If you want to get original 4K resolution, just keep the video size as original. Or set resolution to 1920 * 1080, to compress source 3DR Solo 4K to 1080p.
4. Start converting 3DR Solo K footage to Premiere Pro> Hit the con button of the best 4K Video Converter. It will start converting 3DR Solo 4K for importing to Adobe Premiere Pro immediately. Soon after the conversion, just click "Open" button to get the generated files for natively editing in Premiere Pro CC/CS6 as well as CS5/CS4/CS3 perfectly.
Free Download or Purchase Dimo Video Converter Ultimate for Mac/Win:
Kindly Note:
The price of Dimo Video Converter Ultimate for Mac is divided into 1 Year Subscription, Lifetime/Family/Business License: $43.95/Year; $45.95/lifetime license; $95.95/family license(2-4 Macs); $189.95/business pack(5-8 Macs). Get your needed one at purchase page.
Related Software:
BDmate (Mac/Win)
Lossless backup Blu-ray to MKV with all audio and subtitle tracks; Rip Blu-ray to multi-track MP4; Convert Blu-ray to almost all popular video/audio formats and devices; Copy Blu-ray to ISO/M2TS; Share digitized Blu-ray wirelessly.
DVDmate (Mac/Win)
A professional DVD ripping and editing tool with strong ability to remove DVD protection, transcode DVD to any video and audio format, and edit DVD to create personal movie.
Videomate (Mac/Win)
An all-around video converter software program that enables you to convert various video and audio files to formats that are supported by most multimedia devices.
8K Player (Mac/Win)
A mixture of free HD/4K video player, music player, Blu-ray/DVD player, video recorder and gif maker.
Contact us or leave a message at Facebook if you have any issues.
Related Articles:
Source: How to Edit 3DR Solo 4K video in Premiere Pro
Note: If you want to get original 4K resolution, just keep the video size as original. Or set resolution to 1920 * 1080, to compress source 3DR Solo 4K to 1080p.
4. Start converting 3DR Solo K footage to Premiere Pro> Hit the con button of the best 4K Video Converter. It will start converting 3DR Solo 4K for importing to Adobe Premiere Pro immediately. Soon after the conversion, just click "Open" button to get the generated files for natively editing in Premiere Pro CC/CS6 as well as CS5/CS4/CS3 perfectly.
Free Download or Purchase Dimo Video Converter Ultimate for Mac/Win:
Kindly Note:
The price of Dimo Video Converter Ultimate for Mac is divided into 1 Year Subscription, Lifetime/Family/Business License: $43.95/Year; $45.95/lifetime license; $95.95/family license(2-4 Macs); $189.95/business pack(5-8 Macs). Get your needed one at purchase page.
Related Software:
BDmate (Mac/Win)
Lossless backup Blu-ray to MKV with all audio and subtitle tracks; Rip Blu-ray to multi-track MP4; Convert Blu-ray to almost all popular video/audio formats and devices; Copy Blu-ray to ISO/M2TS; Share digitized Blu-ray wirelessly.
DVDmate (Mac/Win)
A professional DVD ripping and editing tool with strong ability to remove DVD protection, transcode DVD to any video and audio format, and edit DVD to create personal movie.
Videomate (Mac/Win)
An all-around video converter software program that enables you to convert various video and audio files to formats that are supported by most multimedia devices.
8K Player (Mac/Win)
A mixture of free HD/4K video player, music player, Blu-ray/DVD player, video recorder and gif maker.
Contact us or leave a message at Facebook if you have any issues.
Related Articles:
Source: How to Edit 3DR Solo 4K video in Premiere Pro
There are occasions that you need to import footage on DVD to Avid Media Composer 8/7/6/5 for further editing. However, DVD videos does not natively work within Avid MC. In order to bring DVD to Avid Media Composer, DVD video files must be ripped off disc and then converted. This process works to rip DVD video for use in Avid MC.
 To rip DVD for Avid easily and quickly, Dimo Video Converter Ultimate for Mac is highly recommended. By runing it, there is no need to set the codec yourself, the program has an optimized preset for Avid MC. In addition, it also exports some advanced encoders like DNxHD, Apple Intermediate Codec, ProRes, MPEG-2, allowing to convert DVD to seamlessly fit Avid Media Composer, iMovie, Final Cut Pro, Adobe Premiere, etc. on macos Sierra.
If you're using a Windows PC, please turn to Dimo Video Converter Ultimate (Windows 8.1/10 compatible), which has the same function as the Mac version. Now download the right version and follow the tips below to finish your task.
To rip DVD for Avid easily and quickly, Dimo Video Converter Ultimate for Mac is highly recommended. By runing it, there is no need to set the codec yourself, the program has an optimized preset for Avid MC. In addition, it also exports some advanced encoders like DNxHD, Apple Intermediate Codec, ProRes, MPEG-2, allowing to convert DVD to seamlessly fit Avid Media Composer, iMovie, Final Cut Pro, Adobe Premiere, etc. on macos Sierra.
If you're using a Windows PC, please turn to Dimo Video Converter Ultimate (Windows 8.1/10 compatible), which has the same function as the Mac version. Now download the right version and follow the tips below to finish your task.
Free Download Dimo Video Converter Ultimate for Mac/Win:
How to Convert and Import DVD clips into Avid Media Composer
Step 1. Load DVD movies
Insert the DVD disc into your DVD-ROM and click "Add DVD" icon to import the DVD movies. In addition, click the main file of DVD movies (the longest one) you can select the audio track as you like. Not only DVD, but also Blu-ray, MP4, MKV, MOV or other SD/HD/4K videos are supported.
 Step 2: Select output format
Click "Select Format" bar and choose "Editor > DNxHD 720P or DNxHD 1080P" from the pull down menu.
Step 3: Start to rip DVD movies to DNxHD MOV
Tap "Start" button to start the DVD to Avid MC conversion under macos Sierra. After the conversion, importing the ripped video files to Avid Media Composer should be smooth and simple .
Extra Tips:
a. Adjust the video and audio parameters, including the Bitrate of Video & Audio, Video Size, Sample Rate, Frame Rate, Audio Channels, etc., by clicking the Settings button on the main interface for getting the best quality before starting conversion.
Step 2: Select output format
Click "Select Format" bar and choose "Editor > DNxHD 720P or DNxHD 1080P" from the pull down menu.
Step 3: Start to rip DVD movies to DNxHD MOV
Tap "Start" button to start the DVD to Avid MC conversion under macos Sierra. After the conversion, importing the ripped video files to Avid Media Composer should be smooth and simple .
Extra Tips:
a. Adjust the video and audio parameters, including the Bitrate of Video & Audio, Video Size, Sample Rate, Frame Rate, Audio Channels, etc., by clicking the Settings button on the main interface for getting the best quality before starting conversion.
 b. This DVD to DNxHD Converter Mac offers optimized DVD video editing functions, empowering user to crop video file size, trim video segment, add watermark/effects and so on to realize different needs.
c. After editing, you can convert and share Avid MC exported video files on mobile devices.
Free Download or Purchase Dimo Video Converter Ultimate for Mac/Win:
Kindly Note:
The price of Dimo Video Converter Ultimate for Mac is divided into 1 Year Subscription, Lifetime/Family/Business License: $43.95/Year; $45.95/lifetime license; $95.95/family license(2-4 Macs); $189.95/business pack(5-8 Macs). Get your needed one at purchase page.
Related Software:
BDmate (Mac/Win)
Lossless backup Blu-ray to MKV with all audio and subtitle tracks; Rip Blu-ray to multi-track MP4; Convert Blu-ray to almost all popular video/audio formats and devices; Copy Blu-ray to ISO/M2TS; Share digitized Blu-ray wirelessly.
DVDmate (Mac/Win)
A professional DVD ripping and editing tool with strong ability to remove DVD protection, transcode DVD to any video and audio format, and edit DVD to create personal movie.
Videomate (Mac/Win)
An all-around video converter software program that enables you to convert various video and audio files to formats that are supported by most multimedia devices.
8K Player (Mac/Win)
A mixture of free HD/4K video player, music player, Blu-ray/DVD player, video recorder and gif maker.
Contact us or leave a message at Facebook if you have any issues.
Related Articles:
Source: How to Rip and Import DVD into Avid Media Composer
b. This DVD to DNxHD Converter Mac offers optimized DVD video editing functions, empowering user to crop video file size, trim video segment, add watermark/effects and so on to realize different needs.
c. After editing, you can convert and share Avid MC exported video files on mobile devices.
Free Download or Purchase Dimo Video Converter Ultimate for Mac/Win:
Kindly Note:
The price of Dimo Video Converter Ultimate for Mac is divided into 1 Year Subscription, Lifetime/Family/Business License: $43.95/Year; $45.95/lifetime license; $95.95/family license(2-4 Macs); $189.95/business pack(5-8 Macs). Get your needed one at purchase page.
Related Software:
BDmate (Mac/Win)
Lossless backup Blu-ray to MKV with all audio and subtitle tracks; Rip Blu-ray to multi-track MP4; Convert Blu-ray to almost all popular video/audio formats and devices; Copy Blu-ray to ISO/M2TS; Share digitized Blu-ray wirelessly.
DVDmate (Mac/Win)
A professional DVD ripping and editing tool with strong ability to remove DVD protection, transcode DVD to any video and audio format, and edit DVD to create personal movie.
Videomate (Mac/Win)
An all-around video converter software program that enables you to convert various video and audio files to formats that are supported by most multimedia devices.
8K Player (Mac/Win)
A mixture of free HD/4K video player, music player, Blu-ray/DVD player, video recorder and gif maker.
Contact us or leave a message at Facebook if you have any issues.
Related Articles:
Source: How to Rip and Import DVD into Avid Media Composer
The Typhoon H from YUNEEC hexacopter features the GCO3+ gimbal-stabilized, 4K camera with 12MP stills mode, making it a great choice for aerial imaging of all types. However, when you try to play the Typhoon-H output 4K files on PC, iPhone, iPad, media devices or edit the 4K videos in NLEs including Final Cut Pro, Adobe Premiere Pro, Avid Media Composer, iMovie, etc, you find it's not an easy task…
 For those who wanna play and edit Typhoon-H 4K videos on old computer(editing a 4K video requires more computing power and it could be more time consuming), we suggest you to convert/downscale 4K to 1080p then edit the project in 1080p and smart-render. Although there are numbered video converter tools and utilities can convert and compress the ultra HD videos, few of them can process at a fast speed. Well, Dimo Video Converter Ultimate for Mac is considered to be the best 4K to HD video converter.
It is surely in the support of compressing Typhoon-H 4K videos to 1080p faultlessly. What's more, this video app can help you to convert 4K MOV/MP4 from Typhoon-H to FCP/Adobe Premiere/After Effects/Avid MC/Davinci Resolve, iMovie, YouTube/VLC compatible format like Apple ProRes, MPEG-2, DNxHD, Apple InterMediate Codec, H.264, etc. Thanks to the built-in video editor, you can trim, crop and retouch your videos in clicks. Overall, this program is a completely professional 4K HD video converter, player and editor.
What's more, this Ultra HD Video Converter is also available to customize the output resolutions to any size the users want. For Windows users, Dimo Video Converter Ultimate is the alternative choice. Download it and learn how to.
For those who wanna play and edit Typhoon-H 4K videos on old computer(editing a 4K video requires more computing power and it could be more time consuming), we suggest you to convert/downscale 4K to 1080p then edit the project in 1080p and smart-render. Although there are numbered video converter tools and utilities can convert and compress the ultra HD videos, few of them can process at a fast speed. Well, Dimo Video Converter Ultimate for Mac is considered to be the best 4K to HD video converter.
It is surely in the support of compressing Typhoon-H 4K videos to 1080p faultlessly. What's more, this video app can help you to convert 4K MOV/MP4 from Typhoon-H to FCP/Adobe Premiere/After Effects/Avid MC/Davinci Resolve, iMovie, YouTube/VLC compatible format like Apple ProRes, MPEG-2, DNxHD, Apple InterMediate Codec, H.264, etc. Thanks to the built-in video editor, you can trim, crop and retouch your videos in clicks. Overall, this program is a completely professional 4K HD video converter, player and editor.
What's more, this Ultra HD Video Converter is also available to customize the output resolutions to any size the users want. For Windows users, Dimo Video Converter Ultimate is the alternative choice. Download it and learn how to.
Free Download Dimo Video Converter Ultimate for Mac/Win:
Guide: How to downscale/convert Typhoon-H Ultra HD 4K to 1080p
Step 1. Load Typhoon-H 4K Video
Launch the 4K to 1080p Converter for Mac from Dimo; click "Add File" and load your 4K files from Typhoon-H or hard drive.
 Step 2. Select output format
Now select a proper format as the output format from the drop-down-list of "Select Format". There are MP4, MOV, AVI, WMV, etc. available for your choice. If you want to convert Typhoon-H 4K footage to editing in Final Cut Pro, Premiere Pro, Avid or iMovie, there are professional encoders like ProRes, MPEG-2, DNxHD, Apple Intermediate Codec, etc. in the "Editor" category. Here we take "Format > Video" > "MP4" as example. After selecting the output format, you can choose an output path as the destination folder to save the converted 1080p MP4 movie.
Step 3. Set 1080p resolution
Click "Settings" button to customize these settings. Please set the "Resolution" as 1920*1080. Meanwhile, other parameters can be adjusted according to your own requirements.
Step 2. Select output format
Now select a proper format as the output format from the drop-down-list of "Select Format". There are MP4, MOV, AVI, WMV, etc. available for your choice. If you want to convert Typhoon-H 4K footage to editing in Final Cut Pro, Premiere Pro, Avid or iMovie, there are professional encoders like ProRes, MPEG-2, DNxHD, Apple Intermediate Codec, etc. in the "Editor" category. Here we take "Format > Video" > "MP4" as example. After selecting the output format, you can choose an output path as the destination folder to save the converted 1080p MP4 movie.
Step 3. Set 1080p resolution
Click "Settings" button to customize these settings. Please set the "Resolution" as 1920*1080. Meanwhile, other parameters can be adjusted according to your own requirements.
 Step 4. Start 4K to 1080p conversion
Hit "Start" button to let the Typhoon-H 4K to 1080p conversion begin. When the conversion finished, check the generated 1080p video, you will certainly be satisfied with its final video quality. It would be much easier for you to playback and edit.
Step 4. Start 4K to 1080p conversion
Hit "Start" button to let the Typhoon-H 4K to 1080p conversion begin. When the conversion finished, check the generated 1080p video, you will certainly be satisfied with its final video quality. It would be much easier for you to playback and edit.
Free Download or Purchase Dimo Video Converter Ultimate for Mac/Win:
Kindly Note:
The price of Dimo Video Converter Ultimate for Mac is divided into 1 Year Subscription, Lifetime/Family/Business License: $43.95/Year; $45.95/lifetime license; $95.95/family license(2-4 Macs); $189.95/business pack(5-8 Macs). Get your needed one at purchase page.
Related Software:
BDmate (Mac/Win)
Lossless backup Blu-ray to MKV with all audio and subtitle tracks; Rip Blu-ray to multi-track MP4; Convert Blu-ray to almost all popular video/audio formats and devices; Copy Blu-ray to ISO/M2TS; Share digitized Blu-ray wirelessly.
DVDmate (Mac/Win)
A professional DVD ripping and editing tool with strong ability to remove DVD protection, transcode DVD to any video and audio format, and edit DVD to create personal movie.
Videomate (Mac/Win)
An all-around video converter software program that enables you to convert various video and audio files to formats that are supported by most multimedia devices.
8K Player (Mac/Win)
A mixture of free HD/4K video player, music player, Blu-ray/DVD player, video recorder and gif maker.
Contact us or leave a message at Facebook if you have any issues.
Related Articles:
Source: Downscaling Yuneec Typhoon H 4K to 1080p Playing