DJI is perhaps the current leader in the consumer drone market and with good reason. Among all the DJI consumer drones, the Mavic Pro has got to be our favorite. This cool, insectile looking little drone can stay aloft for more than 25 minutes, offer a flight range of several miles and comes with some excellent 4K shootings. However, there are some issues like crashing, unsupported file type when getting DJI Mavic Pro video to work in GoPro Studio, especially in 4K. So, how to import DJI Mavic Pro 4K video to GoPro Studio beautifully?
 According to GoPro Studio official statement, GoPro Studio supports importing the following files in "Step 1: Import & Convert":
MP4 video files from the original HD Hero Original, HD Hero 2, HERO3, and HERO3+.
MOV video files from Canon and Nikon DSLRs (except in Windows 8).
JPG files from GoPro HD Hero, Hero 2 and Hero 3 cameras (.jpgs from other sources may work, but have not been tested nor are they officially supported).
And GoPro Studio supports importing the following file formats directly for editing in "Step 2: Edit": GoPro CineForm AVI or MOV files (MOV only on Mac). Audio formats: MP3, WAV, AIFF, M4A and CAF
While DJI Mavic Pro records:
Video:
MP4, MOV (MPEG-4 AVC/H.264)
Video Recording Modes:
C4K: 4096×2160 24p
4K: 3840×2160 24/25/30p
2.7K: 2720x1530 24/25/30p
FHD: 1920×1080 24/25/30/48/50/60/96p
HD: 1280×720 24/25/30/48/50/60/120p
However, GoPro Studio supports not all kinds of MP4/MOV formats, like some 4K MP4/MOV files with unacceptable high bitrate/resolution or big size from Mavic Pro. To be able to work with Mavic Pro 4K video files in GoPro Studio flawlessly, we would recommend transcoding them to a format that is well compatible with GoPro Studio.
Solution 1: Use GoPro Studio
To use GoPro Studio, you need to import the files, either .MP4 or .MOV, into Studio and then convert them to .AVI files, this is the normal process for Studio. Once converted, they can be edited as easily as GoPro files. At the conclusion, you can export the edited cut to a number of formats, including files intended for YouTube, Facebook and such. If you try to cut the original files, you get that message saying they are unsupported.
Solution 2: Use s a powerful alternative tool to GoPro Studio
Dimo Video Converter for Ultimate/Videomate is just suitable to your needs, which is an all-in-one video converter, player and editor. Overall, the program is the best Video Converter for DJI 4K footage. With this DJI 4K video converter, you can effortlessly transcode DJI Mavic Pro 4k MP4/MOV to AVI/H.264 MP4, which will create an GoPro Studio friendly file format keeping the DJI original quality.
Besides GoPro Studio, this software can also export DNxHD for Avid MC, MPEG-2 for Sony Vegas, Premiere Pro/Element, WMV for Windows Movie Maker and more NLE systems for native editing, even MP4 foriPhone/iPad/VLC/Kodi/QuickTime for playback smoothly. What's more, this video app allows you to trim clips, crop videos, add effects, insert watermark, etc as GoPro Studio does. For Mac(OS Sierra) users, Dimo Video Converter Ultimate for Mac is the alternative choice. Just download it and follow the tutorial below to get the work done.
According to GoPro Studio official statement, GoPro Studio supports importing the following files in "Step 1: Import & Convert":
MP4 video files from the original HD Hero Original, HD Hero 2, HERO3, and HERO3+.
MOV video files from Canon and Nikon DSLRs (except in Windows 8).
JPG files from GoPro HD Hero, Hero 2 and Hero 3 cameras (.jpgs from other sources may work, but have not been tested nor are they officially supported).
And GoPro Studio supports importing the following file formats directly for editing in "Step 2: Edit": GoPro CineForm AVI or MOV files (MOV only on Mac). Audio formats: MP3, WAV, AIFF, M4A and CAF
While DJI Mavic Pro records:
Video:
MP4, MOV (MPEG-4 AVC/H.264)
Video Recording Modes:
C4K: 4096×2160 24p
4K: 3840×2160 24/25/30p
2.7K: 2720x1530 24/25/30p
FHD: 1920×1080 24/25/30/48/50/60/96p
HD: 1280×720 24/25/30/48/50/60/120p
However, GoPro Studio supports not all kinds of MP4/MOV formats, like some 4K MP4/MOV files with unacceptable high bitrate/resolution or big size from Mavic Pro. To be able to work with Mavic Pro 4K video files in GoPro Studio flawlessly, we would recommend transcoding them to a format that is well compatible with GoPro Studio.
Solution 1: Use GoPro Studio
To use GoPro Studio, you need to import the files, either .MP4 or .MOV, into Studio and then convert them to .AVI files, this is the normal process for Studio. Once converted, they can be edited as easily as GoPro files. At the conclusion, you can export the edited cut to a number of formats, including files intended for YouTube, Facebook and such. If you try to cut the original files, you get that message saying they are unsupported.
Solution 2: Use s a powerful alternative tool to GoPro Studio
Dimo Video Converter for Ultimate/Videomate is just suitable to your needs, which is an all-in-one video converter, player and editor. Overall, the program is the best Video Converter for DJI 4K footage. With this DJI 4K video converter, you can effortlessly transcode DJI Mavic Pro 4k MP4/MOV to AVI/H.264 MP4, which will create an GoPro Studio friendly file format keeping the DJI original quality.
Besides GoPro Studio, this software can also export DNxHD for Avid MC, MPEG-2 for Sony Vegas, Premiere Pro/Element, WMV for Windows Movie Maker and more NLE systems for native editing, even MP4 foriPhone/iPad/VLC/Kodi/QuickTime for playback smoothly. What's more, this video app allows you to trim clips, crop videos, add effects, insert watermark, etc as GoPro Studio does. For Mac(OS Sierra) users, Dimo Video Converter Ultimate for Mac is the alternative choice. Just download it and follow the tutorial below to get the work done.
Free Download Dimo Video Converter Ultimate (Win/Mac):

 How to Convert DJI Mavic Pro 4K H.264 MP4/MOV for Editing in GoPro Studio
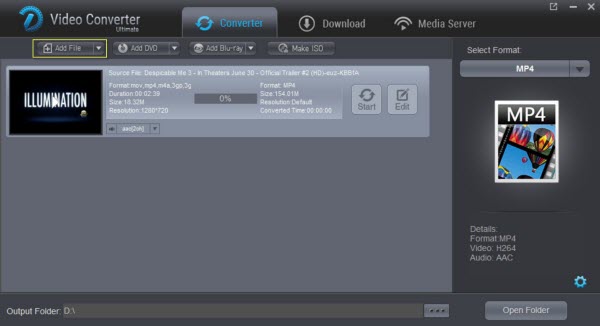
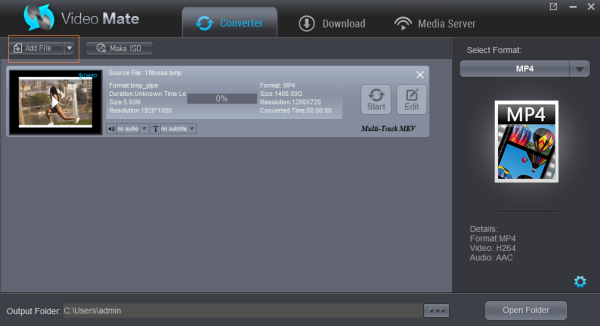
Step 1: Install and run Dimo Video Converter Ultimate, and then click the "Add File" button to load the Mavic Pro 4k videos.
How to Convert DJI Mavic Pro 4K H.264 MP4/MOV for Editing in GoPro Studio
Step 1: Install and run Dimo Video Converter Ultimate, and then click the "Add File" button to load the Mavic Pro 4k videos.
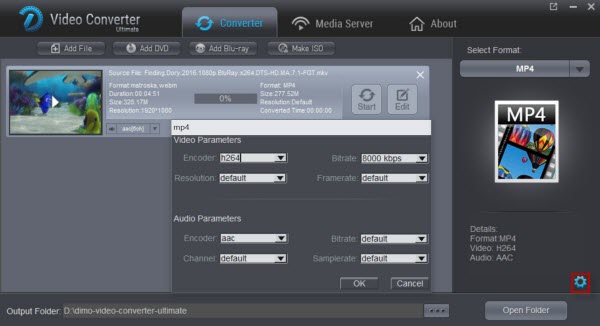
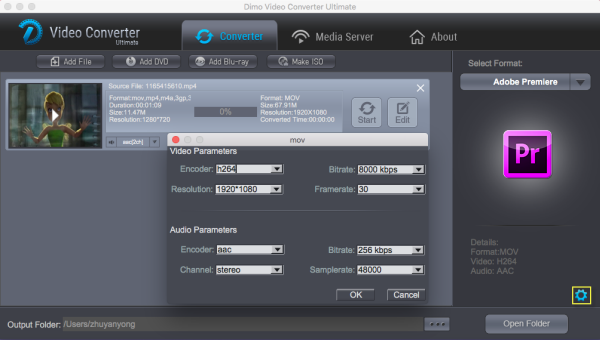
 Step 2: Click "Select Format" bar and choose AVI or MP4 from "Format > Video" or "Format > HD Video" as output format on the drop-down menu.
Tip: Click the Settings icon to adjust video and audio parameters on the Profile Setting as you need to get the best quality video. To down-convert ultra HD 4K to 1080p, do remember adjusting video size to 1920*1080. That is the exact 1080p.
Step 2: Click "Select Format" bar and choose AVI or MP4 from "Format > Video" or "Format > HD Video" as output format on the drop-down menu.
Tip: Click the Settings icon to adjust video and audio parameters on the Profile Setting as you need to get the best quality video. To down-convert ultra HD 4K to 1080p, do remember adjusting video size to 1920*1080. That is the exact 1080p.
 Step 3: Simply click the "Start" button to start converting and everything else will be automated. If you have added quite a bunch of video files, it would take some time to convert. You're done. Now your DJI Mavic Pro 4K H.264 MP4/MOV files will be converted into AVI/MP4 files ready to be imported to GoPro Studio perfectly.
Free Download or Purchase Dimo Video Converter Ultimate:


 Kindly Note:
The price of Dimo Video Converter Ultimate for Windows is divided into 1 Year Subscription, Lifetime/Family/Business License: $43.95/Year; $45.95/lifetime license; $95.95/family license(2-4 PCs); $189.95/business pack(5-8 PCs). Get your needed one at purchase page.
Contact us or leave a message at Facebook if you have any issues.
Related Articles:
Kindly Note:
The price of Dimo Video Converter Ultimate for Windows is divided into 1 Year Subscription, Lifetime/Family/Business License: $43.95/Year; $45.95/lifetime license; $95.95/family license(2-4 PCs); $189.95/business pack(5-8 PCs). Get your needed one at purchase page.
Contact us or leave a message at Facebook if you have any issues.
Related Articles:
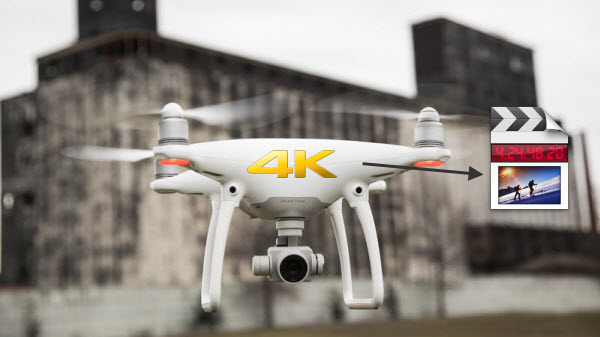
The Phantom 4 is a beautifully designed camera drone. The onboard camera shoots 4K footage at 30 frames per second. When got smooth and stabilized 4K video shootings from DJI Phantom 4, how can we import and edit Phantom 4 4K video in FCP X/7? What's the best workflow for 4K footage from DJI Phantom 4 to Final Cut Pro? Some tricks are listed in the following paragraphs.
 Well, compatibility is very critical for a successful editing of 4K videos so you should not proceed without an assurance on this one. Your videos should come with a format that is compatible with Final Cut Pro otherwise you are going to experience challenges in editing. Based on our testing, we found H.264 encoded MP4 or MOV file format from DJI Phantom 4 is beyond the compatibility of FCP 7.
Learn from Apple official site, we know that FCP X can support editing and monitoring 4K video, including 4K ProRes, Sony XAVC and REDCODE RAW from version 10.1. But the point here is, Final Cut Pro 7 still uses 1080p as primary delivery format and will continue to do so for a long time. In this case, to import and edit Phantom 4 4K clips in FCP 7 smoothly, you are advised to convert and downscale 4K to 1080p from DJI Phantom 4 for FCP 7 before editing.
To achieve the goal, a professional 4K Video Converter for Mac is the key. Dimo Videomate for Mac is highly recommended here. The program is an easy-to-use yet professional Phantom 4 4K Converter for FCP. It's able to convert Phantom 4 4K MP4/MOV files to Apple ProRes 422, Apple ProRes 422(HQ), Apple ProRes 422 (LT), Apple ProRes 422 (Proxy), and Apple ProRes 4444 for Final Cut Pro. Besides, this Mac 4K Video Converter is also available to customize the output resolutions to any size like 1080p, 2K, 4K as users want.
Plus, this 4K video app can also encode any 4K videos including 4K XAVC/XAVC S, 4K MOV, 4K MP4, 4K AVI, 4K MTS, etc to Avid Media Composer, iMovie, Adobe Premiere Pro, Davinci Resolve, etc. on Mac(OS Sierra). If you are working on Windows (Windows 10 included), please turn to Videomate which can transcode 4K to Apple Prores for FCP on Windows. Just download it and follow the tutorial below to get the work done.
Free Download Videomate for Mac/Win:
Tips Editing DJI Phantom 4 4K MP4/MOV in Final Cut Pro
Step 1: Load 4K footage to the converter
Run the best 4K to FCP Converter and click "Add File" button, browse to the DJI Phantom 4 footages and load them to the converter for conversion.
Well, compatibility is very critical for a successful editing of 4K videos so you should not proceed without an assurance on this one. Your videos should come with a format that is compatible with Final Cut Pro otherwise you are going to experience challenges in editing. Based on our testing, we found H.264 encoded MP4 or MOV file format from DJI Phantom 4 is beyond the compatibility of FCP 7.
Learn from Apple official site, we know that FCP X can support editing and monitoring 4K video, including 4K ProRes, Sony XAVC and REDCODE RAW from version 10.1. But the point here is, Final Cut Pro 7 still uses 1080p as primary delivery format and will continue to do so for a long time. In this case, to import and edit Phantom 4 4K clips in FCP 7 smoothly, you are advised to convert and downscale 4K to 1080p from DJI Phantom 4 for FCP 7 before editing.
To achieve the goal, a professional 4K Video Converter for Mac is the key. Dimo Videomate for Mac is highly recommended here. The program is an easy-to-use yet professional Phantom 4 4K Converter for FCP. It's able to convert Phantom 4 4K MP4/MOV files to Apple ProRes 422, Apple ProRes 422(HQ), Apple ProRes 422 (LT), Apple ProRes 422 (Proxy), and Apple ProRes 4444 for Final Cut Pro. Besides, this Mac 4K Video Converter is also available to customize the output resolutions to any size like 1080p, 2K, 4K as users want.
Plus, this 4K video app can also encode any 4K videos including 4K XAVC/XAVC S, 4K MOV, 4K MP4, 4K AVI, 4K MTS, etc to Avid Media Composer, iMovie, Adobe Premiere Pro, Davinci Resolve, etc. on Mac(OS Sierra). If you are working on Windows (Windows 10 included), please turn to Videomate which can transcode 4K to Apple Prores for FCP on Windows. Just download it and follow the tutorial below to get the work done.
Free Download Videomate for Mac/Win:
Tips Editing DJI Phantom 4 4K MP4/MOV in Final Cut Pro
Step 1: Load 4K footage to the converter
Run the best 4K to FCP Converter and click "Add File" button, browse to the DJI Phantom 4 footages and load them to the converter for conversion.
 Step 2: Choose a proper output format
Click "Select Format" bar to choose output format. You are recommended to choose "Format -> Editor -> Final Cut Pro 7" or "Format -> Editor -> Final Cut Pro X" as the target format.
Tip: Advanced 4K video settings
Click "Settings" button if you'd like to customize advanced audio and video parameters like Video Codec, aspect ratio, bit rate, frame rate, Audio codec, sample rate, audio channels. Usually 1920*1080 video size and 30fps video frame rate are recommended for FCP editing.
Note: If you want to get original 4K resolution, just keep the video size as original to get 4K ProRes for FCP.
Step 3: Start converting Phantom 4 4K to Apple Prores
When you finish all settings, hit "Start" button to start transcoding DJI Phantom 4 4K video for Final Cut Pro on Mac. You can follow the conversion process from the pop-up windows. After the conversion, it's freely to import Phantom 4 4K MP4/MOV footage into FCP X/7 for natively editing.
Simple Steps to Edit converted 4K Video in Final Cut Pro
1. Load Files
You can decide to click "edit" on the menu bar then "load media files" which is very easy. If you have no time to do all that, just drag the files and drop them to the program timeline.
2. Customize
Click on "settings" and that will allow you to change key parameters in the best way possible. You will be able to adjust parameters for both video and audio if applicable.
3. Actual Editing
You will get to make all the changes you want to the video and apply that. Be aware that Final Cut Pro will edit only sections of the 4K video that have been marked for that so don't expect a miracle.
4. Save
Make sure you have clicked the "save" button once through with editing to make the changes applicable and permanent. After editing, you can re-encode them to a suitable format for your iPad/iPhone/Android and free share edited video from FCP onto your mobile devices with Videomate for Mac/Win.
Additional Tip:
Get Dimo Video Converter Ultimate for Mac/Dimo Video Converter Ultimate with Only $45.95, which can save you $63.9(BDmate $39.95 + Videomate $39.95 + DVDmate $29.95 = $109.85), then you can enjoy any Blu-ray/DVD/ISO or common movies freely on Mac(OS Sierra).
Related Software:
BDmate (Mac/Win)
Lossless backup Blu-ray to MKV with all audio and subtitle tracks; Rip Blu-ray to multi-track MP4; ConvertBlu-ray to almost all popular video/audio formats and devices; Copy Blu-ray to ISO/M2TS; Share digitized Blu-ray wirelessly.
DVDmate (Mac/Win)
A professional DVD ripping and editing tool with strong ability to remove DVD protection, transcode DVD to any video and audio format, and edit DVD to create personal movie.
8K Player (Mac/Win)
A mixture of free HD/4K video player, music player, Blu-ray/DVD player, video recorder and gif maker.
Free Download or Purchase Videomate for Mac/Win:
Step 2: Choose a proper output format
Click "Select Format" bar to choose output format. You are recommended to choose "Format -> Editor -> Final Cut Pro 7" or "Format -> Editor -> Final Cut Pro X" as the target format.
Tip: Advanced 4K video settings
Click "Settings" button if you'd like to customize advanced audio and video parameters like Video Codec, aspect ratio, bit rate, frame rate, Audio codec, sample rate, audio channels. Usually 1920*1080 video size and 30fps video frame rate are recommended for FCP editing.
Note: If you want to get original 4K resolution, just keep the video size as original to get 4K ProRes for FCP.
Step 3: Start converting Phantom 4 4K to Apple Prores
When you finish all settings, hit "Start" button to start transcoding DJI Phantom 4 4K video for Final Cut Pro on Mac. You can follow the conversion process from the pop-up windows. After the conversion, it's freely to import Phantom 4 4K MP4/MOV footage into FCP X/7 for natively editing.
Simple Steps to Edit converted 4K Video in Final Cut Pro
1. Load Files
You can decide to click "edit" on the menu bar then "load media files" which is very easy. If you have no time to do all that, just drag the files and drop them to the program timeline.
2. Customize
Click on "settings" and that will allow you to change key parameters in the best way possible. You will be able to adjust parameters for both video and audio if applicable.
3. Actual Editing
You will get to make all the changes you want to the video and apply that. Be aware that Final Cut Pro will edit only sections of the 4K video that have been marked for that so don't expect a miracle.
4. Save
Make sure you have clicked the "save" button once through with editing to make the changes applicable and permanent. After editing, you can re-encode them to a suitable format for your iPad/iPhone/Android and free share edited video from FCP onto your mobile devices with Videomate for Mac/Win.
Additional Tip:
Get Dimo Video Converter Ultimate for Mac/Dimo Video Converter Ultimate with Only $45.95, which can save you $63.9(BDmate $39.95 + Videomate $39.95 + DVDmate $29.95 = $109.85), then you can enjoy any Blu-ray/DVD/ISO or common movies freely on Mac(OS Sierra).
Related Software:
BDmate (Mac/Win)
Lossless backup Blu-ray to MKV with all audio and subtitle tracks; Rip Blu-ray to multi-track MP4; ConvertBlu-ray to almost all popular video/audio formats and devices; Copy Blu-ray to ISO/M2TS; Share digitized Blu-ray wirelessly.
DVDmate (Mac/Win)
A professional DVD ripping and editing tool with strong ability to remove DVD protection, transcode DVD to any video and audio format, and edit DVD to create personal movie.
8K Player (Mac/Win)
A mixture of free HD/4K video player, music player, Blu-ray/DVD player, video recorder and gif maker.
Free Download or Purchase Videomate for Mac/Win:

 Contact us or leave a message at Facebook if you have any issues.
Related Articles:
Source: Import DJI Phantom 4 4K files to FCP X/7 on macos Sierra
Contact us or leave a message at Facebook if you have any issues.
Related Articles:
Source: Import DJI Phantom 4 4K files to FCP X/7 on macos Sierra
An upgraded follow-up to the XC10, Canon XC15 is capable of capturing high-image quality and low-noise 4K UHD video, thanks to its high-sensitivity one-inch CMOS sensor and DIGIC DV 5 image processing platform with high calculation-processing power. If you record some 4K videos, you may wanna work with the Canon XC15 4K in Adobe Premiere Pro (CC, CS6, etc) on macos Sierra. However, it seems a bit complicated as PPro won't ingest 4K MXF from XC15 as you expected. So, what's the solution?
 At first, let's look at Canon XC15 video recording:
Recording file format: Material eXchange Format (MXF)
Recording format: Video Format: XF-AVC. Compression Format: MPEG-4 AVC/H.264
Literally, the latest version Premiere Pro CC, CS6 has the ability to handle 4K files without much problem, but it is extremely hardware intensive owing to the codec issue and resolution. Worse still, Canon XC15 uses the new XF-AVC movie recording codec, employs the MPEG-4 AVC/H.264 video compression format, and packages shootings in an MXF wrapper, which is not an ideal format for most editing software including Adobe Premiere Pro. Some guys recommend to install the latest updates, try some MXF plug-ins, but still didn't work well.
To solve the problem, you need to convert Canon XC15 4K to MOV for Premiere Pro as primary delivery format. With the help of Dimo Video Converter Ultimate for Mac, you can easily achieve the goal. Hot News! DimoSoft has launched a user-requested upgrade for full line of media converting products for Win/Mac to version 2.7.3. Existing bugs, improvements and new elements for MXF encoding are added.
This program can be used to transcode any 4K MXF from Canon XC15, XC10, 5D Mark IV, C500, C300, XF305, XF100, XF300..., as well as 4K MTS/MOV/MP4 files from Canon/Sony/Nikon/DJI to Premiere Pro native MPEG-2/H.264 codec mov format on macos Sierra ensuring maximum editing quality and efficiency when working with Premiere Pro CC, Premiere Pro CS6, etc..
In addition, it also offers other optimized codec for non-linear editing programs, such as DNxHD for Avid MC/Davinci Resolve, ProRes for FCP, etc. Moreover, it also is a professional video editing software to assist users with trimming, cropping, rotating, adjusting effects, attaching watermark, making 3D... to create your own videos. If you are a Windows user, you can turn to Dimo Video Converter Ultimate for help.
At first, let's look at Canon XC15 video recording:
Recording file format: Material eXchange Format (MXF)
Recording format: Video Format: XF-AVC. Compression Format: MPEG-4 AVC/H.264
Literally, the latest version Premiere Pro CC, CS6 has the ability to handle 4K files without much problem, but it is extremely hardware intensive owing to the codec issue and resolution. Worse still, Canon XC15 uses the new XF-AVC movie recording codec, employs the MPEG-4 AVC/H.264 video compression format, and packages shootings in an MXF wrapper, which is not an ideal format for most editing software including Adobe Premiere Pro. Some guys recommend to install the latest updates, try some MXF plug-ins, but still didn't work well.
To solve the problem, you need to convert Canon XC15 4K to MOV for Premiere Pro as primary delivery format. With the help of Dimo Video Converter Ultimate for Mac, you can easily achieve the goal. Hot News! DimoSoft has launched a user-requested upgrade for full line of media converting products for Win/Mac to version 2.7.3. Existing bugs, improvements and new elements for MXF encoding are added.
This program can be used to transcode any 4K MXF from Canon XC15, XC10, 5D Mark IV, C500, C300, XF305, XF100, XF300..., as well as 4K MTS/MOV/MP4 files from Canon/Sony/Nikon/DJI to Premiere Pro native MPEG-2/H.264 codec mov format on macos Sierra ensuring maximum editing quality and efficiency when working with Premiere Pro CC, Premiere Pro CS6, etc..
In addition, it also offers other optimized codec for non-linear editing programs, such as DNxHD for Avid MC/Davinci Resolve, ProRes for FCP, etc. Moreover, it also is a professional video editing software to assist users with trimming, cropping, rotating, adjusting effects, attaching watermark, making 3D... to create your own videos. If you are a Windows user, you can turn to Dimo Video Converter Ultimate for help.
Free Download Dimo Video Converter Ultimate for Mac/Win:
How to convert Canon XC15 MXF to Adobe Premiere Pro
Step 1. Load Source Video
Launch the Mac 4K to 1080p Converter; Drag and drop Canon XC15 videos to this software. (Or click "Add File" button on the main interface to import the video.)
Step 2. Decide Output Format
Go to "Select Format" menu and choose "Format -> Editor -> Adobe Premiere“ as target format for using XC15 4K MXF in Adobe e Premiere Pro.
 And by clicking Edit, you can trim, crop videos, adjust video effects, add watermarks, etc.
Step 3. Set Video Resolution at 1080p
Click "Settings" button; you can adjust video and audio settings, including codec, aspect ratio, bit rate, frame rate, sample rate, and audio channel. To down-convert ultra HD 4K MXF to 1080p MOV, do remember adjusting video size to 1920*1080. That is the exact 1080p.
And by clicking Edit, you can trim, crop videos, adjust video effects, add watermarks, etc.
Step 3. Set Video Resolution at 1080p
Click "Settings" button; you can adjust video and audio settings, including codec, aspect ratio, bit rate, frame rate, sample rate, and audio channel. To down-convert ultra HD 4K MXF to 1080p MOV, do remember adjusting video size to 1920*1080. That is the exact 1080p.
 Step 4. Start 4K to Premiere Pro Conversion
Hit "Start" button to let the Canon X15 MXF to Premiere 1080p mov conversion begin. When the conversion finished, check the generated 1080p video, you will certainly be satisfied with its final video quality. Now, it is easy for you to import the encoded 4K videos from XC15 to Premiere Pro (CC/CS6/CS5/CS4) on macos Sierra for further editing.
Related Software:
BDmate (Mac/Win)
Lossless backup Blu-ray to MKV with all audio and subtitle tracks; Rip Blu-ray to multi-track MP4; Convert Blu-ray to almost all popular video/audio formats and devices; Copy Blu-ray to ISO/M2TS; Share digitized Blu-ray wirelessly.
DVDmate (Mac/Win)
A professional DVD ripping and editing tool with strong ability to remove DVD protection, transcode DVD to any video and audio format, and edit DVD to create personal movie.
8K Player (Mac/Win)
A mixture of free HD/4K video player, music player, Blu-ray/DVD player, video recorder and gif maker.
Free Download or Purchase Dimo Video Converter Ultimate for Mac/Win:
Kindly Note:
The price of Dimo Video Converter Ultimate for Mac is divided into 1 Year Subscription, Lifetime/Family/Business License: $43.95/Year; $45.95/lifetime license; $95.95/family license(2-4 Macs); $189.95/business pack(5-8 Macs). Get your needed one at purchase page.
Contact us or leave a message at Facebook if you have any issues.
Related Articles:
Step 4. Start 4K to Premiere Pro Conversion
Hit "Start" button to let the Canon X15 MXF to Premiere 1080p mov conversion begin. When the conversion finished, check the generated 1080p video, you will certainly be satisfied with its final video quality. Now, it is easy for you to import the encoded 4K videos from XC15 to Premiere Pro (CC/CS6/CS5/CS4) on macos Sierra for further editing.
Related Software:
BDmate (Mac/Win)
Lossless backup Blu-ray to MKV with all audio and subtitle tracks; Rip Blu-ray to multi-track MP4; Convert Blu-ray to almost all popular video/audio formats and devices; Copy Blu-ray to ISO/M2TS; Share digitized Blu-ray wirelessly.
DVDmate (Mac/Win)
A professional DVD ripping and editing tool with strong ability to remove DVD protection, transcode DVD to any video and audio format, and edit DVD to create personal movie.
8K Player (Mac/Win)
A mixture of free HD/4K video player, music player, Blu-ray/DVD player, video recorder and gif maker.
Free Download or Purchase Dimo Video Converter Ultimate for Mac/Win:
Kindly Note:
The price of Dimo Video Converter Ultimate for Mac is divided into 1 Year Subscription, Lifetime/Family/Business License: $43.95/Year; $45.95/lifetime license; $95.95/family license(2-4 Macs); $189.95/business pack(5-8 Macs). Get your needed one at purchase page.
Contact us or leave a message at Facebook if you have any issues.
Related Articles:
WLMP, short for Windows Live Movie Maker, is a project file saved with Windows Live Movie Maker on Windows 8 or Windows 7. With it, you can easily make family movies from photos, videos, and music. However, you should know that WLMP file is not a video file. Therefore, if you want to play or share your created movie in a WLMP video file, you have to convert WLMP to MP4 first. Now you are in the right place learn how to convert WLMP files to MP4 after exporting to WMV from Windows Movie Maker.
 How to convert WLMP to MP4 or Other Formats
To fulfill the task, what you need is a powerful video converter which contains no limitation on the transforming from WMLP output WMV format to MP4 or other formats like MPG, FLV, AVI, MOV, etc.. Dimo Videomate is one of the most powerful WMV video converter available. This software allows you to work on the conversion between virtually any video formats. The supported formats include WMV, AVI, MKV, MOV, MPEG, MP4, FLV, H.265, etc.
What's more, you can make changes to the video by using its video editing functions. You can change the visual effects, adding watermark, cropping, trimming in the list of choices. In additional, this program has a simple interface and its drag-and-drop functionality makes the conversion easier to all users. The users who want to convert WMV files on macOS Sierra, El Capitan, Yosemite can have a try on Dimo Videomate for Mac. Just download this powerful software, follow the guide below and enjoy the thrill of WLMP to MP4 video conversion now!
Free Download Videomate (Win/Mac):
How to Convert Windows Live Movie Maker Files to MP4
Step 1. Export Windows Live Movie Maker files to WMV files
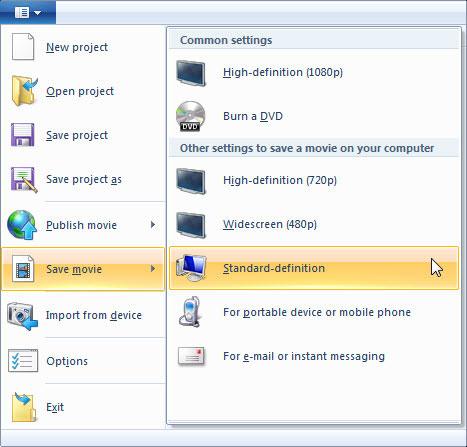
Launch Windows Live Movie Maker, go to "File -> Open project" to import your local Windows Live Movie Maker project files. Click "File" again, and then select "Save movie" > "Standard-definition" to export to WMV format.
How to convert WLMP to MP4 or Other Formats
To fulfill the task, what you need is a powerful video converter which contains no limitation on the transforming from WMLP output WMV format to MP4 or other formats like MPG, FLV, AVI, MOV, etc.. Dimo Videomate is one of the most powerful WMV video converter available. This software allows you to work on the conversion between virtually any video formats. The supported formats include WMV, AVI, MKV, MOV, MPEG, MP4, FLV, H.265, etc.
What's more, you can make changes to the video by using its video editing functions. You can change the visual effects, adding watermark, cropping, trimming in the list of choices. In additional, this program has a simple interface and its drag-and-drop functionality makes the conversion easier to all users. The users who want to convert WMV files on macOS Sierra, El Capitan, Yosemite can have a try on Dimo Videomate for Mac. Just download this powerful software, follow the guide below and enjoy the thrill of WLMP to MP4 video conversion now!
Free Download Videomate (Win/Mac):
How to Convert Windows Live Movie Maker Files to MP4
Step 1. Export Windows Live Movie Maker files to WMV files
Launch Windows Live Movie Maker, go to "File -> Open project" to import your local Windows Live Movie Maker project files. Click "File" again, and then select "Save movie" > "Standard-definition" to export to WMV format.
 Step 2. Add WMV video files to the program
Install and launch this WLMP to MP4 converter, open it, go to "Converter" menu and then click "Add File" button to load your WMV video files you want to convert. Or, you can also directly drag and drop the WMV files into the program. If you want to specify the output folder, just click the three dots beside Open Folder to choose your desired folder.
Step 2. Add WMV video files to the program
Install and launch this WLMP to MP4 converter, open it, go to "Converter" menu and then click "Add File" button to load your WMV video files you want to convert. Or, you can also directly drag and drop the WMV files into the program. If you want to specify the output folder, just click the three dots beside Open Folder to choose your desired folder.
 Step 3. Select MP4 as output Format.
Go to "Format" -> "Video" from "Select Format", select "MP4" as output format. Or choose HD/4K MP4 from "HD Video". The optimized default settings ensure a good balance between WLMP to MP4 conversion speed and quality.
If you are planning to transfer the converted files to your iOS devices like iPad, iPhone or iPod etc. you can choose the presets supplied by the professional Video Converter so that you needn’t set the resolution, frame rate etc. by yourself. And the presets are contained in "Device">"Apple" category.
Note: If you are demanding in high quality, you can adjust parameter settings to improve output video quliaty. The first one is to select codec as "H.264" rather than "MPEG-4", cuz H.264 is known as MPEG-4 Part 10 – Advanced Video Coding (MPEG-4 AVC), providing much higher quality than MPEG-4.
Turn up Frame Rate to 25fps or 30fps to guarantee a sharper image for output video.
Adjust Resolution up, and you can even increase resolution to 4K Ultra HD or 8K Ultra HD based on your original WMV video quality. Certainly, you choose high quality and you will lose comparatively faster speed, for you can’t have cake and eat it.
Step 3. Select MP4 as output Format.
Go to "Format" -> "Video" from "Select Format", select "MP4" as output format. Or choose HD/4K MP4 from "HD Video". The optimized default settings ensure a good balance between WLMP to MP4 conversion speed and quality.
If you are planning to transfer the converted files to your iOS devices like iPad, iPhone or iPod etc. you can choose the presets supplied by the professional Video Converter so that you needn’t set the resolution, frame rate etc. by yourself. And the presets are contained in "Device">"Apple" category.
Note: If you are demanding in high quality, you can adjust parameter settings to improve output video quliaty. The first one is to select codec as "H.264" rather than "MPEG-4", cuz H.264 is known as MPEG-4 Part 10 – Advanced Video Coding (MPEG-4 AVC), providing much higher quality than MPEG-4.
Turn up Frame Rate to 25fps or 30fps to guarantee a sharper image for output video.
Adjust Resolution up, and you can even increase resolution to 4K Ultra HD or 8K Ultra HD based on your original WMV video quality. Certainly, you choose high quality and you will lose comparatively faster speed, for you can’t have cake and eat it.
 Step 4. Edit WMV files(optional)
After selecting your preferred WMV file, you can make desired changes by clicking on the Edit icon. When access to the Video Edit panel, you can trim, crop, add watermarks, adjust effect, create 3D, etc. to modify your videos for the best visual effects.
Step 4. Begin Windows Movie Maker .WMV to MP4 conversion
Hit "Start" and let this smart WLMP to MP4 Video Converter do the rest for you! If your WMV video files is quite large, around 1GB and over 1 hour in length, don’t be worried, the whole WMV to MP4 conversion will not cost your wonderful afternoon time. After the conversion, you'll get resulted videos via "Open" for playback or sharing with high quality.
Additional Tip:
Get Dimo Video Converter Ultimate/Dimo Video Converter Ultimate for Mac with Only $45.95, which can save you $63.9(BDmate $39.95 + Videomate $39.95 + DVDmate $29.95 = $109.85), then you can enjoy any Blu-ray/DVD/ISO or common movies freely on Windows 10/8/8.1/7/Vista/XP.
Related Software:
BDmate (Win/Mac)
Lossless backup Blu-ray to MKV with all audio and subtitle tracks; Rip Blu-ray to multi-track MP4; ConvertBlu-ray to almost all popular video/audio formats and devices; Copy Blu-ray to ISO/M2TS; Share digitized Blu-ray wirelessly.
DVDmate (Win/Mac)
A professional DVD ripping and editing tool with strong ability to remove DVD protection, transcode DVD to any video and audio format, and edit DVD to create personal movie.
Step 4. Edit WMV files(optional)
After selecting your preferred WMV file, you can make desired changes by clicking on the Edit icon. When access to the Video Edit panel, you can trim, crop, add watermarks, adjust effect, create 3D, etc. to modify your videos for the best visual effects.
Step 4. Begin Windows Movie Maker .WMV to MP4 conversion
Hit "Start" and let this smart WLMP to MP4 Video Converter do the rest for you! If your WMV video files is quite large, around 1GB and over 1 hour in length, don’t be worried, the whole WMV to MP4 conversion will not cost your wonderful afternoon time. After the conversion, you'll get resulted videos via "Open" for playback or sharing with high quality.
Additional Tip:
Get Dimo Video Converter Ultimate/Dimo Video Converter Ultimate for Mac with Only $45.95, which can save you $63.9(BDmate $39.95 + Videomate $39.95 + DVDmate $29.95 = $109.85), then you can enjoy any Blu-ray/DVD/ISO or common movies freely on Windows 10/8/8.1/7/Vista/XP.
Related Software:
BDmate (Win/Mac)
Lossless backup Blu-ray to MKV with all audio and subtitle tracks; Rip Blu-ray to multi-track MP4; ConvertBlu-ray to almost all popular video/audio formats and devices; Copy Blu-ray to ISO/M2TS; Share digitized Blu-ray wirelessly.
DVDmate (Win/Mac)
A professional DVD ripping and editing tool with strong ability to remove DVD protection, transcode DVD to any video and audio format, and edit DVD to create personal movie.
8K Player (Win/Mac)
A mixture of free HD/4K video player, music player, Blu-ray/DVD player, video recorder and gif maker.
Free Download or Purchase Videmate:
Contact us or leave a message at Facebook if you have any issues.
Related Articles:
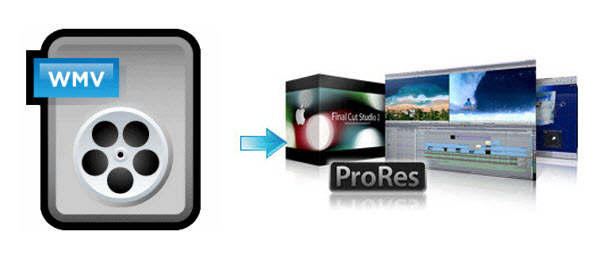
WMV (Windows Media Video) is a compressed video format developed by Microsoft and widely used in Windows. If you have got some WMV videos and tried to import them to FCP X/7, you can easily find that WMV is not compatible with Final Cut Pro. Let's face it, Windows and Mac will never fully get along. A quick and easy solution to make your WMV video compatible with FCP is to convert the WMV file to FCP editing-friendly codecs. This article shows you how to transcode WMV files to FCP-compatible apple prores codec with the maximum editing quality and efficiency. Read on for details.
 To adjust WMV to FCP file, you can adopt Dimo Videomate for Mac for help which is able make WMV file compatible with Final Cut Pro X/7. It is fully compatible with all major Mac OS X operating systems like Sierra, El Capitan, Yosemite, Mavericks, Mountain Lion, Lion, and Snow Leopard.
Overall, the program is a professional yet all-in-one video conversion tool. With it, you can easily rewrap all WMV files to Apple ProRes 422, Apple ProRes 422 HQ, Apple ProRes 422 LT, Apple ProRes 422 Proxy, and Apple ProRes 4444 for natively using in Final Cut Pro X/7. Besides, the Mac video converter canconvert HD videos from HD camcorders or DVs (like JVC, Panasonic, Sony and Cannon) forediting in Final Cut Pro, Final Cut Pro X, Final Cut Express, iMovie, Avid MC,Adobe Premiere Pro, Davinci Resolve, etc. Windows version can also produce apple prores codec for native editing. Just download it and follow the tutorial below to convert WMV to Apple ProRes for FCP X/7.
Free Download Videomate for Mac/Win:
How to Convert WMV for Editing in Final Cut Pro
Step 1: Launch the Mac WMV to FCP Converter; click "Add File" button from main menu to browse your computer hard drive and select the WMV files you want to convert. Or you can easily drag-and-drop files into this application for converting. You can also load video files formatted in .mkv, .avi, .flv, .vob, .mxf, .mpg, etc.
Step 2: Click the Select Format bar, and move mouse cursor to "Format > Editor" and choose "Final Cut Pro X", "Final Cut Pro 7" or "Apple ProRes 422" as output format.
Step 3: Click "Convert" button to start encoding WMV files to Apple ProRes MOV for Final Cut Pro under Mac OS (Sierra).
Some more helpful features of the WMV to FCP Converter for Mac:
1. Settings – click to set video resolution(1920×1080/1440×1080/1280×720/720×480), bitrate(from 1Mbps to 20Mbps), frame rate (24p/30p)
To adjust WMV to FCP file, you can adopt Dimo Videomate for Mac for help which is able make WMV file compatible with Final Cut Pro X/7. It is fully compatible with all major Mac OS X operating systems like Sierra, El Capitan, Yosemite, Mavericks, Mountain Lion, Lion, and Snow Leopard.
Overall, the program is a professional yet all-in-one video conversion tool. With it, you can easily rewrap all WMV files to Apple ProRes 422, Apple ProRes 422 HQ, Apple ProRes 422 LT, Apple ProRes 422 Proxy, and Apple ProRes 4444 for natively using in Final Cut Pro X/7. Besides, the Mac video converter canconvert HD videos from HD camcorders or DVs (like JVC, Panasonic, Sony and Cannon) forediting in Final Cut Pro, Final Cut Pro X, Final Cut Express, iMovie, Avid MC,Adobe Premiere Pro, Davinci Resolve, etc. Windows version can also produce apple prores codec for native editing. Just download it and follow the tutorial below to convert WMV to Apple ProRes for FCP X/7.
Free Download Videomate for Mac/Win:
How to Convert WMV for Editing in Final Cut Pro
Step 1: Launch the Mac WMV to FCP Converter; click "Add File" button from main menu to browse your computer hard drive and select the WMV files you want to convert. Or you can easily drag-and-drop files into this application for converting. You can also load video files formatted in .mkv, .avi, .flv, .vob, .mxf, .mpg, etc.
Step 2: Click the Select Format bar, and move mouse cursor to "Format > Editor" and choose "Final Cut Pro X", "Final Cut Pro 7" or "Apple ProRes 422" as output format.
Step 3: Click "Convert" button to start encoding WMV files to Apple ProRes MOV for Final Cut Pro under Mac OS (Sierra).
Some more helpful features of the WMV to FCP Converter for Mac:
1. Settings – click to set video resolution(1920×1080/1440×1080/1280×720/720×480), bitrate(from 1Mbps to 20Mbps), frame rate (24p/30p)
 2. Editor – Click to set deinterlace, denoise, volume up, trim, crop, add watermark/effect, create 3D, etc.
Once the WMV to ProRes 422 conversion is done, you can transfer your WMV files into Final Cut Pro X/7 for editing smoothly on Mac with ease.
Additional Tip: How Do I Export Final Cut Pro Videos to WMV
Intend to play your edited videos from Final Cut Pro on Windows PCs? Then having your output file be converted to the .wmv format is the best solution as doing so will make it easier for you to use your finished video in Windows systems.
So don't close FCP after you have finished working. Have your finished project exported into the .mov format. Open the above FCP to WMV Converter again and import your new .mov file by either clicking "Add File" or dropping it into the window. Then simply go to the Format > Video category and click on "WMV" to select it as output format.
At last, click on "Convert" to start converting FCP output mov to WMV. Just wait for the video converter to do all the work for you and your new .wmv video will be ready soon enough. So you can make a new WMV copy that runs well in Windows aside from your .mov copy of the video that works well with your Mac.
Good News! Just grab Dimo Video Converter Ultimate for Mac/Dimo Video Converter Ultimate with Only $45.95, which can save you $63.9(BDmate $39.95 + Videomate $39.95 + DVDmate $29.95 = $109.85), then you can enjoy any Blu-ray/DVD/ISO or common movies freely on Windows 10/8/8.1/7/Vista/XP.
Related Software:
BDmate (Mac/Win)
Lossless backup Blu-ray to MKV with all audio and subtitle tracks; Rip Blu-ray to multi-track MP4; ConvertBlu-ray to almost all popular video/audio formats and devices; Copy Blu-ray to ISO/M2TS; Share digitized Blu-ray wirelessly.
DVDmate (Mac/Win)
A professional DVD ripping and editing tool with strong ability to remove DVD protection, transcode DVD to any video and audio format, and edit DVD to create personal movie.
2. Editor – Click to set deinterlace, denoise, volume up, trim, crop, add watermark/effect, create 3D, etc.
Once the WMV to ProRes 422 conversion is done, you can transfer your WMV files into Final Cut Pro X/7 for editing smoothly on Mac with ease.
Additional Tip: How Do I Export Final Cut Pro Videos to WMV
Intend to play your edited videos from Final Cut Pro on Windows PCs? Then having your output file be converted to the .wmv format is the best solution as doing so will make it easier for you to use your finished video in Windows systems.
So don't close FCP after you have finished working. Have your finished project exported into the .mov format. Open the above FCP to WMV Converter again and import your new .mov file by either clicking "Add File" or dropping it into the window. Then simply go to the Format > Video category and click on "WMV" to select it as output format.
At last, click on "Convert" to start converting FCP output mov to WMV. Just wait for the video converter to do all the work for you and your new .wmv video will be ready soon enough. So you can make a new WMV copy that runs well in Windows aside from your .mov copy of the video that works well with your Mac.
Good News! Just grab Dimo Video Converter Ultimate for Mac/Dimo Video Converter Ultimate with Only $45.95, which can save you $63.9(BDmate $39.95 + Videomate $39.95 + DVDmate $29.95 = $109.85), then you can enjoy any Blu-ray/DVD/ISO or common movies freely on Windows 10/8/8.1/7/Vista/XP.
Related Software:
BDmate (Mac/Win)
Lossless backup Blu-ray to MKV with all audio and subtitle tracks; Rip Blu-ray to multi-track MP4; ConvertBlu-ray to almost all popular video/audio formats and devices; Copy Blu-ray to ISO/M2TS; Share digitized Blu-ray wirelessly.
DVDmate (Mac/Win)
A professional DVD ripping and editing tool with strong ability to remove DVD protection, transcode DVD to any video and audio format, and edit DVD to create personal movie.
8K Player (Mac/Win)
A mixture of free HD/4K video player, music player, Blu-ray/DVD player, video recorder and gif maker.
Free Download or Purchase Videmate for Mac/Win:
Contact us or leave a message at Facebook if you have any issues.
Related Articles:
Source: How to Make WMV files work in FCP X and FCP 7